First Steps With Azure Storage
At the Aaltra hackathons we get the chance to test out new technologies and broaden our horizon, one of the many things that makes it awesome to work for them. In one of the Belgian Internet of Things community meetups I attended, Pedro Dias gave a demo about the IOT stuff he had built to water his plants. He collected all sorts of data from different hardware sensors and sent them to Azure Table Storage. I gave it a test drive on the latest company hackathon.
I have been ignoring Azure for a while now, only using it to quickly spin up a web app to deploy a demo. Due to the, for me, unclear pricing and the clunky portal it was a platform I avoided. About time that changed.
If all you have is a SQL Server hammer everything looks like a relational database. There is no silver bullet in solving software projects and although NoSQL databases did not replace relational databases like once was predicted, they do have their use. Enter Azure Table Storage.
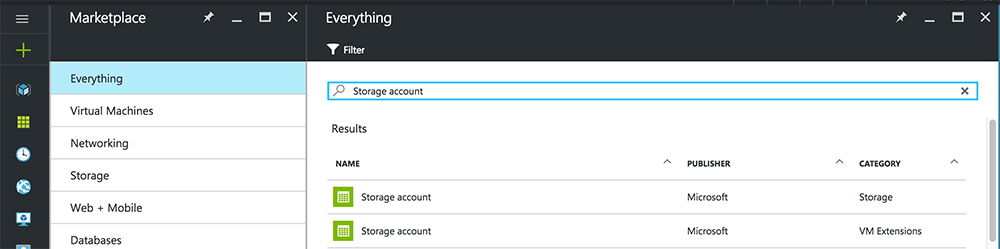
The first thing we need is an Azure Storage account. The easiest way to get one is to log in to the Azure portal and create a new Storage Account. The most important thing you need from this account are the access keys. You will use them to access your storage account via code.
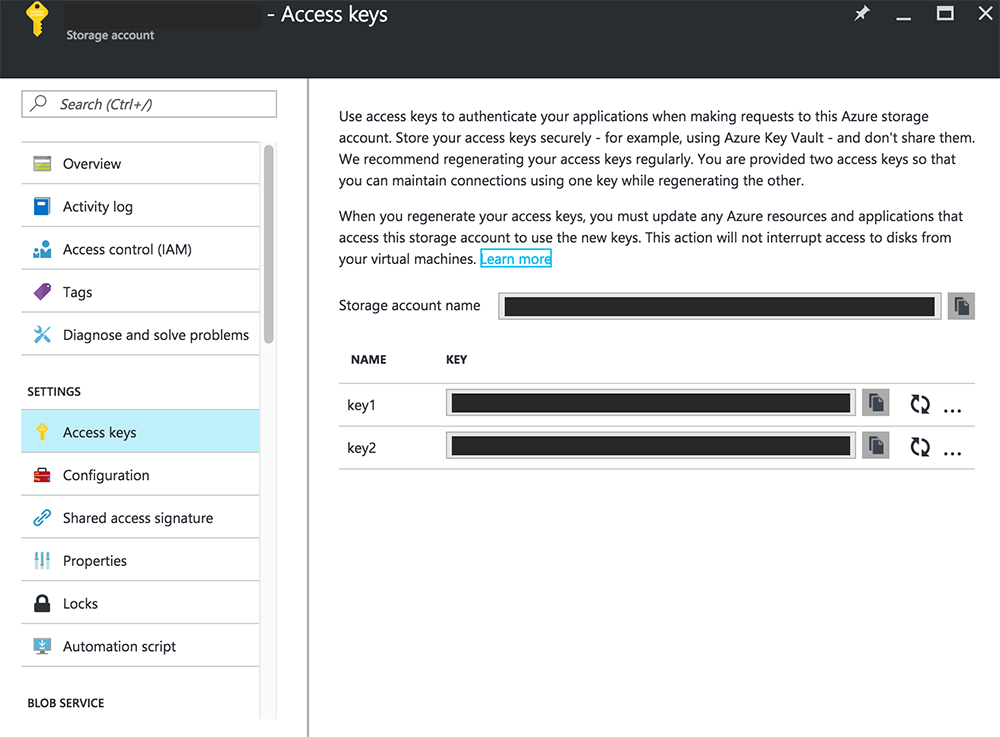
Now that we have our Storage Account we can get to the fun stuff. First let's connect to the account and create a new table. Because Azure Table Storage is a NoSQL database, there is no notion of columns and we don't need to define them. We'll need the Windows Azure Storage Nuget package so that has to be installed in your Visual Studio project. The following code connects to the storage account and creates a table called "offense". The string passed to the CloudStorageAccount Parse method is comparable to a database connection string and contains the name of the storage account and one of the keys that can be found in the details of the storage account on the Azure portal.
var storageAccount = CloudStorageAccount.Parse("DefaultEndpointsProtocol=https;AccountName=<storage-account-name>;AccountKey=<storage-account-key>)";
var tableClient = storageAccount.CreateCloudTableClient();
var table = tableClient.GetTableReference("offense");
table.CreateIfNotExists();
For this test I've used a data set of minor traffic offenses in Antwerp. You can find the data set on the open data site of the city of Antwerp (Dutch). The data has the following columns:
- Id
- Date
- Street
- Driving direction
- Speed limit
- Number of passages
- Number of speed offenses
- Number of red light offenses
The next step is putting some data into the newly created table. Remember: Azure Table Storage does not have columns, instead you just insert entities into the table. It's perfectly valid to put two different entities with different properties into the same table.
The object that is being saved must inherit from TableEntity. By inheriting from this class, the entity class gets two extra properties: PartitionKey and RowKey. This is a fast way to look up the entities. The data is being divided into partitions, so it is important to use a relevant PartitionKey.
This is the entity that is being saved:
public class Offense : TableEntity
{
    public Offense(int id)
    {
        PartitionKey = "antwerp";
        RowKey = id.ToString();
        Id = id;
    }

    public Offense()
    {

    }

    public int Id { get; set; }
    public DateTime? Date { get; set; }
    public string Street { get; set; }
    public string Direction { get; set; }
    public int Speed { get; set; }
    public int NumberOfPassages { get; set; }
    public int NumberOfSpeedOffenses { get; set; }
    public int NumberOfRedLightOffenses { get; set; }
}
As PartitionKey I've chosen "antwerp", with the idea that if we get data from other cities we can select the data for a certain city using that PartitionKey. Saving an entity is easy, there is also the possibility to bulk save entities with a batch operation which is a lot faster than saving the entities one by one.
Saving one entity:
var storageAccount = CloudStorageAccount.Parse("DefaultEndpointsProtocol=https;AccountName=<storage-account-name>;AccountKey=<storage-account-key>)";
var tableClient = storageAccount.CreateCloudTableClient();
var table = tableClient.GetTableReference("offense");
table.CreateIfNotExists();

var offense = new Offense(1){
	Street = "street",
	Direction "inbound",
	NumberOfPassages = 200,
	NumberOfSpeedOffenses = 15
	/* ... */
};

var operation = TableOperation.Insert(offense);
table.Execute(operation);
Batch saving entities is limited to saving 100 entities in one batch:
var storageAccount = CloudStorageAccount.Parse("DefaultEndpointsProtocol=https;AccountName=<storage-account-name>;AccountKey=<storage-account-key>)";
var tableClient = storageAccount.CreateCloudTableClient();
var table = tableClient.GetTableReference("offense");
table.CreateIfNotExists();

var offense = new Offense(1){
	Street = "street",
	Direction "inbound",
	NumberOfPassages = 200,
	NumberOfSpeedOffenses = 15
	/* ... */
};

var batchOperation = new TableBatchOperation();
batchOperation.Insert(offense);
table.ExecuteBatch(batchOperation);
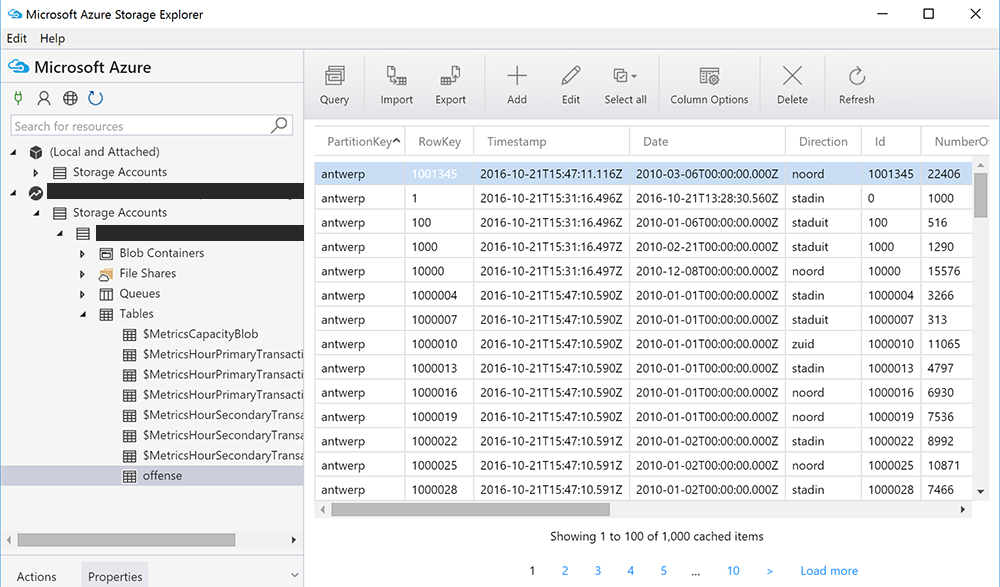
So saving entities is no problem, retrieving them is the next step. If you want to look at the data in your Storage Account the free Azure Storage Explorer is available for Windows, Mac and Linux and a good tool to browse through your data.
Retrieving can be done filtering the entities by PartitionKey, RowKey or another property. In the next example we'll retrieve all entities that have more than 100 passages.
var storageAccount = CloudStorageAccount.Parse("DefaultEndpointsProtocol=https;AccountName=<storage-account-name>;AccountKey=<storage-account-key>)";
var tableClient = storageAccount.CreateCloudTableClient();
var table = tableClient.GetTableReference("offense");
table.CreateIfNotExists();

var query = new TableQuery<Offense>()
		.Where(TableQuery.GenerateFilterConditionForInt(
                "NumberOfPassages", QueryComparisons.GreaterThan, 100));

var offenses = table.ExecuteQuery(query);
Now we want to add a new column to our entity which shows the percentage of speed offenders for that entity. We'll add a new column to our offense entity and update all our existing entities in the offense table.
First let's expand the entity with a new property:
public class Offense : TableEntity
{
    public Offense(int id)
    {
        PartitionKey = "antwerp";
        RowKey = id.ToString();
        Id = id;
    }

    public Offense()
    {

    }

    public int Id { get; set; }
    public DateTime? Date { get; set; }
    public string Street { get; set; }
    public string Direction { get; set; }
    public int Speed { get; set; }
    public int NumberOfPassages { get; set; }
    public int NumberOfSpeedOffenses { get; set; }
    public int NumberOfRedLightOffenses { get; set; }
	public double PercentageOfSpeedOffenders { get; set; }
}
Important to note here that only these data types are supported by Table Storage: Binary, Boolean, DateTime, Double, Guid, Int32, Int64 and String. If you use a data type which is not supported, for example float or decimal, the operation will succeed without throwing an error but your new property will simply not be saved. A little annoying, a warning or error would help.
Now we retrieve all the entities using the PartitionKey, calculate the percentage and update them in the table:
var storageAccount = CloudStorageAccount.Parse("DefaultEndpointsProtocol=https;AccountName=<storage-account-name>;AccountKey=<storage-account-key>)";
var tableClient = storageAccount.CreateCloudTableClient();
var table = tableClient.GetTableReference("offense");
table.CreateIfNotExists();

var query = new TableQuery<Offense>()
		.Where(TableQuery.GenerateFilterCondition("PartitionKey", QueryComparisons.Equal, "antwerp"));

var offenses = table.ExecuteQuery(query);
var counter = 0;
var batchOperation = new TableBatchOperation();

foreach (var offense in offenses)
{
	offense.PercentageOfSpeedOffenders = ((double)offense.NumberOfSpeedOffenses /
					      (double)offense.NumberOfPassages) * 100.0;
	batchOperation.Replace(offense);

	counter++;

	if (counter == 100)
	{
	    table.ExecuteBatch(batchOperation);
	    batchOperation.Clear();
	    counter = 0;
	}
}

if (counter != 100)
{
	table.ExecuteBatch(batchOperation);
	batchOperation.Clear();
}
Once again we use a batch to execute the operations to efficiently update all the entities in the table. Pretty neat how straightforward it all really works. Comparing it to SQL Server is a bit comparing apples to oranges. But if you feel the need to store large amounts of data on the cheap this is a viable option. You can get started without having to set up a server, install SQL Server etc.
If you want to read some more on the subject: Troy Hunt has a good article in which he explains how he uses Azure Table Storage to store more than 154 million records which power the have I been pwned website. Interesting stuff, hope you learned something. I sure did!