Installing a node.js application as a Windows service
It wasn't my intention when I started the first article but this has become a series of how to run node applications in production with IIS on Windows. These are the previous articles on the topic:
- Hosting a Node.js application on Windows with IIS as reverse proxy
- Using HTTP platform handler to host a node.js application via IIS
In the last article a node web application was deployed on a Windows server. With the help of the HTTP platform handler, IIS manages the node process for us. When it receives a request it will start the node process and pass the web request for node to handle it.
In some cases however we don't want to expose the node.js web application via IIS. I have built an internal API in the past which should not be accessible from the outside for security reasons. The internal API is only consumed by other applications running on the same server. In this case, we can't rely on IIS to manage the node process for us as IIS would expose the web application to the internet.
We need an alternative to keep the node process running to make the internal API available on the server via localhost. PM2 can manage the node process and keep it up and running. Unfortunately I did not find a reliable way to start PM2 whenever the Windows Server restarts. Every time the server restarted, the internal API was down and had to be manually started.
Luckily there is a NPM package node-windows which can install a node application as a Windows service. This service can be automatically started when the server restarts.
This is the Hello World sample from the Express website, we will install it as a Windows service:
const express = require('express')
const app = express()
const port = 3000

app.get('/', (req, res) => res.send('Hello World!'))

app.listen(port, () => console.log(`Example app listening at http://localhost:${port}`))
The node-windows NPM package can do this for us. Run the following commands
npm install -g node-windows
npm link node-windows
Once the package is installed it can be used to install the application as a service with the following node script:
var Service = require('node-windows').Service;

// Create a new service object
var svc = new Service({
  name:'Node application as Windows Service',
  description: 'Node application as Windows Service',
  script: 'C:\\temp\\test.js'
});

// Listen for the "install" event, which indicates the
// process is available as a service.
svc.on('install',function(){
  svc.start();
});

svc.install();
Just run the script as any other node script:
node install-windows-service.js
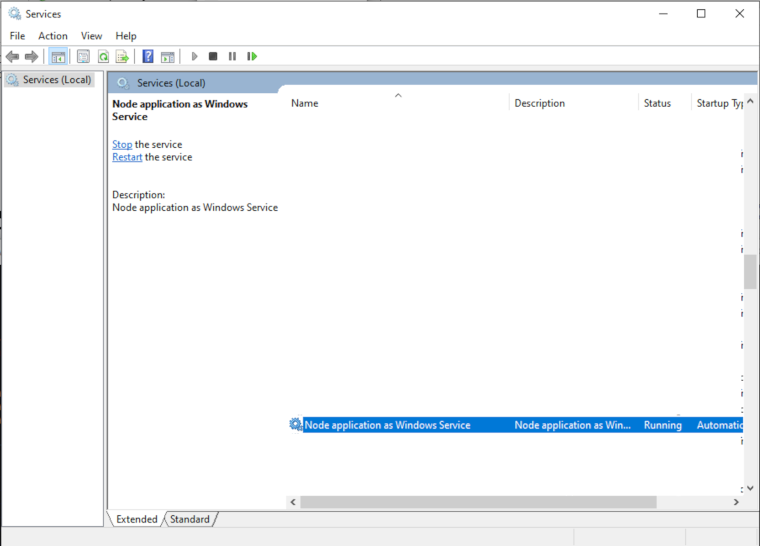
If User Account Control (UAC) is enabled on Windows you will have to give permission a few times to complete the installation. Once this script has finished the service is installed and the application is running. You can find the service in the Services dialog. It will have the name that you have passed to the Service class in the node script.
If the service ever needs to be uninstalled, the Service class also has an uninstall method:
var Service = require('node-windows').Service;

// Create a new service object
var svc = new Service({
  name:'Node application as Windows Service',
  description: 'Node application as Windows Service',
  script: 'C:\\temp\\test.js'
});

// Listen for the "uninstall" event so we know when it's done.
svc.on('uninstall',function(){
  console.log('Uninstall complete.');
  console.log('The service exists: ',svc.exists);
});

// Uninstall the service.
svc.uninstall();
This can also be run as any other node script:
node uninstall-windows.service.js
Because the Windows service is set to start automatic, it will start every time the server is restarted. Exactly as expected. Happy deploying!